Factories > Factory configuration
Factory agents
# Factory agents The **foreman** is the agent that coordinates a factory's work and communicates with you. It delegates work to other agents, asks for your decisions when needed, and returns results. Default agents each cover one part of the software development lifecycle: triage scopes the request, spec writes the plan, implement writes the code, and review checks it. Together, they turn a work item into a pull request ready for your team to review. ## The default agents Every factory gets a foreman. You choose which of the four default agents to include. These defaults are a starting point, and you can [add custom agents and automations](#add-custom-agents-and-automations) for work they don't cover. The default agents' prompts, descriptions, and models are reproduced as files in [`00-warp-default-agents`](https://github.com/warpdotdev/warp-factory-examples/tree/main/examples/00-warp-default-agents) in the [warp-factory-examples](https://github.com/warpdotdev/warp-factory-examples) repository. | Agent | What it does | What it produces | | --- | --- | --- | | Foreman | Coordinates the work and talks to the requester | Decisions, questions, status updates, and the final handoff | | Triage | Investigates the request and establishes scope | Evidence, issue context, complexity, and open questions | | Spec | Turns requirements into a concrete plan with validation criteria | Product and technical specs in a draft pull request | | Implement | Makes and validates the code change | Code, tests, validation results, and visual evidence | | Review | Independently checks the finished change | Findings and a recommendation | These are responsibilities, not a fixed pipeline. A small, well-understood change can skip the Planning stage entirely. If the review agent finds problems, the foreman sends work back for another pass. By default, work that goes through Planning needs a human to approve the spec before the Building stage starts. For the complete lifecycle, see [how Warp Factories work](/factories/how-factories-work/). ### Foreman The **foreman agent** assigns work and is the only default agent that communicates directly with you. It relays questions and answers between you and other agents, and continues their existing conversations for revisions and follow-ups. When finished, it returns the pull request and supporting evidence, then marks the work item complete. Complete means handed off to your team, not merged or deployed. #### Foreman name Use the foreman's handle to @-mention it in Slack and Linear. Factory setup defaults the handle to the factory's name. For example, a factory named `payments` gets the handle `@payments`. Change the handle under **Settings** > **Identity** in the [factory dashboard](/factories/factory-dashboard/), or through [`alias`](/factories/factory-as-code/#alias) in the definition. The factory name and foreman handle can differ. ### Triage Triage researches the codebase and related issues, reproducing problems when research doesn't establish the cause. It reports scope, complexity, and open questions so the foreman can choose clarification, planning, or implementation. ### Spec Spec defines requirements through the foreman. It writes product and technical specifications with validation criteria in a draft pull request. By default, the foreman waits for human approval before implementation starts. You can change this policy in the foreman's instructions. ### Implement Implement builds on the spec's branch and draft pull request. It adds tests, runs repository checks, and captures visual evidence of user-facing changes when [computer use](/agents/capabilities/computer-use/) is available. It revises changes after review but never merges. ### Review Review independently checks requirements, code conventions, tests, security, and supporting evidence. It reruns or extends validation when needed, then recommends acceptance, revisions, or a human decision. It doesn't approve or merge the pull request. ## Built-in skills Every default agent includes GitHub skills; the foreman also includes a Slack skill. Choosing Linear or Jira during setup adds that tracker's skill and instructions. Add custom procedures with [factory skills](/factories/factory-skills/). ## Configure agent behavior For a Warp-managed factory, edit agent settings in the web app. For a GitHub-backed factory, settings are read-only in the web app; edit the [factory definition files](/factories/factory-as-code/) instead. See [where the definition lives](/factories/factory-as-code/#where-the-definition-lives). 1. In the web app sidebar, click your factory to expand it, then click **Agents**. <figure style={{ maxWidth: "563px" }}>  <figcaption>The Agents page lists a factory's foreman and default agents.</figcaption> </figure> 2. Click an agent, then click **Settings**. <figure style={{ maxWidth: "563px" }}>  <figcaption>The Settings tab contains the agent's description and resources.</figcaption> </figure> 3. Edit the agent description, harness, model, runner, host, [MCP servers](/platform/mcp/), or [secrets](/platform/secrets/). 4. To change the agent's instructions, click **Prompt** and edit the prompt. 5. In the top-right corner, click **Save**. ## Choose models and harnesses per agent Each agent can run on its own model and harness. To change the model an agent uses, edit that agent's settings. Supported harnesses include the Warp Agent harness, Claude Code, and Codex, and any agent can use any of them. A foreman running on Claude Code or Codex can still dispatch the factory's other agents, and the runs it starts are still tracked as its children. Third-party harnesses require a paid plan; on the Free plan every agent runs on the Warp Agent harness. See [Warp pricing](https://www.warp.dev/pricing) for what each plan includes. Default model IDs change over time, so choose based on what each agent has to do well: | Agent | What to optimize for | | --- | --- | | Foreman | Orchestration, instruction following, and long-running conversations | | Triage | Research, evidence gathering, and working with connected tools | | Spec | Synthesizing requirements, technical reasoning, and precise writing | | Implement | Coding strength, with a harness that fits your repositories and toolchain | | Review | A different model or harness from the implement agent, so the two don't share blind spots | The model picker also includes custom routers from factories you can access. See [model choice for agents](/agents/inference/model-choice/), [custom model routers](/agents/inference/custom-routers/), and [harnesses for cloud agents](/platform/harnesses/) for available options. ### Configuring a third-party harness Change an agent's harness to Claude Code or Codex to run it with that provider's own coding tool instead of the Warp Agent. 1. In the web app sidebar, click your factory to expand it, then click **Agents**. 2. Click an agent, then click **Settings**. 3. In the "Harness" dropdown, choose **Claude Code** or **Codex**. The "Auth" field appears for these harnesses. 4. In the "Auth" field, choose a compatible, team-owned secret from the list or click **New auth secret** to create one. <figure style={{ maxWidth: "563px" }}>  <figcaption>The Auth dropdown appears when a third-party harness is selected.</figcaption> </figure> :::note * Claude Code accepts an Anthropic API key, Anthropic Bedrock API key, or Anthropic Bedrock access key. * Codex accepts an OpenAI API key. See [connecting Claude Code credentials](/platform/harnesses/authentication/#connecting-claude-code-credentials) and [connecting Codex credentials](/platform/harnesses/authentication/#connecting-codex-credentials) for how to obtain each key. ::: 5. In the "Model" dropdown, choose a model from that harness's catalog. 6. In the top-right corner, click **Save**. With a Warp-managed factory, you can edit harness, auth, and model from the dashboard. A GitHub-backed factory sets them through [`agentDefaults.harness` or a per-agent `harness` override](/factories/factory-as-code/#agentdefaultsharness) in the definition files. For an example, see [`03-multi-harness`](https://github.com/warpdotdev/warp-factory-examples/tree/main/examples/03-multi-harness). ## Add custom agents and automations Add a custom agent for a role that needs separate instructions, configuration, and runs. For a Warp-managed factory, open **Agents** in the [factory dashboard](/factories/factory-dashboard/), click **New**, then click **Custom agent**. For a GitHub-backed factory, add `agents/<name>/agent.md`. See the [`agent.md` configuration keys](/factories/factory-as-code/#agentsnameagentmd). Custom agents have no built-in skills. Add [factory skills](/factories/factory-skills/) based on who needs them: * **One agent** - Put the skill under `agents/<name>/skills/`. * **Every agent** - Put the skill under `skills/`. ### Choose a configured factory agent Use `run_agents` when the foreman should give work to one of the agents configured in your factory. The foreman receives a list of those agents, with a unique ID (UID) for each one. Run the child remotely by setting the call's `remote` field, then copy the chosen agent's UID into `agent_run_configs[].agent_identity_uid`. Only use UIDs from the list, and select an agent for every child in the call. The `name` field only labels the child run; it doesn't choose the factory agent. Warp uses the UID to load that agent's configured environment, runner, host, harness, and model unless the call overrides them. To start a child without factory configuration, use [multi-agent orchestration](/platform/orchestration/) from any Warp conversation. Automations start a chosen agent on a [schedule](/factories/factory-as-code/#triggersschedule) or when an event fires. They're one more way for work to enter your factory; the foreman still coordinates whatever they start. For all the ways to route work into a factory, see [connect your factory](/factories/connect-your-factory/). ## Human decision points and permissions | Decision | Default behavior | What enforces it | | --- | --- | --- | | Spec approval | The foreman asks a human to clarify ambiguity and approve every spec | Workflow policy in the foreman's instructions, which your team can change | | Merging | Agents never merge; the foreman hands the finished pull request to a human | Your repository's permissions decide who can approve and merge | | Runtime access | Each agent reaches only the repositories, secrets, and MCP servers in its configuration | Platform configuration and the permissions of the connected providers | The first two rows are conventions: they live in the foreman's instructions and your repository settings, and your team can change them. Access is different. What an agent can reach comes from its configuration and the permissions of the connected providers, never from its instructions — changing what an agent is told to do doesn't change what it's able to do. So enforce with the real controls: branch protection and repository permissions decide who merges, and each agent's configuration decides what it can reach. Next, capture these choices in [factory definitions as code](/factories/factory-as-code/).Tell me about this feature: https://docs.warp.dev/factories/factory-agents/Every factory has a team of default agents: a foreman that coordinates the work, plus triage, spec, implement, and review agents.
The foreman is the agent that coordinates a factory’s work and communicates with you. It delegates work to other agents, asks for your decisions when needed, and returns results. Default agents each cover one part of the software development lifecycle: triage scopes the request, spec writes the plan, implement writes the code, and review checks it. Together, they turn a work item into a pull request ready for your team to review.
The default agents
Section titled “The default agents”Every factory gets a foreman. You choose which of the four default agents to include. These defaults are a starting point, and you can add custom agents and automations for work they don’t cover. The default agents’ prompts, descriptions, and models are reproduced as files in 00-warp-default-agents in the warp-factory-examples repository.
| Agent | What it does | What it produces |
|---|---|---|
| Foreman | Coordinates the work and talks to the requester | Decisions, questions, status updates, and the final handoff |
| Triage | Investigates the request and establishes scope | Evidence, issue context, complexity, and open questions |
| Spec | Turns requirements into a concrete plan with validation criteria | Product and technical specs in a draft pull request |
| Implement | Makes and validates the code change | Code, tests, validation results, and visual evidence |
| Review | Independently checks the finished change | Findings and a recommendation |
These are responsibilities, not a fixed pipeline. A small, well-understood change can skip the Planning stage entirely. If the review agent finds problems, the foreman sends work back for another pass. By default, work that goes through Planning needs a human to approve the spec before the Building stage starts.
For the complete lifecycle, see how Warp Factories work.
Foreman
Section titled “Foreman”The foreman agent assigns work and is the only default agent that communicates directly with you. It relays questions and answers between you and other agents, and continues their existing conversations for revisions and follow-ups.
When finished, it returns the pull request and supporting evidence, then marks the work item complete. Complete means handed off to your team, not merged or deployed.
Foreman name
Section titled “Foreman name”Use the foreman’s handle to @-mention it in Slack and Linear. Factory setup defaults the handle to the factory’s name. For example, a factory named payments gets the handle @payments.
Change the handle under Settings > Identity in the factory dashboard, or through alias in the definition. The factory name and foreman handle can differ.
Triage
Section titled “Triage”Triage researches the codebase and related issues, reproducing problems when research doesn’t establish the cause. It reports scope, complexity, and open questions so the foreman can choose clarification, planning, or implementation.
Spec defines requirements through the foreman. It writes product and technical specifications with validation criteria in a draft pull request. By default, the foreman waits for human approval before implementation starts. You can change this policy in the foreman’s instructions.
Implement
Section titled “Implement”Implement builds on the spec’s branch and draft pull request. It adds tests, runs repository checks, and captures visual evidence of user-facing changes when computer use is available. It revises changes after review but never merges.
Review
Section titled “Review”Review independently checks requirements, code conventions, tests, security, and supporting evidence. It reruns or extends validation when needed, then recommends acceptance, revisions, or a human decision. It doesn’t approve or merge the pull request.
Built-in skills
Section titled “Built-in skills”Every default agent includes GitHub skills; the foreman also includes a Slack skill. Choosing Linear or Jira during setup adds that tracker’s skill and instructions. Add custom procedures with factory skills.
Configure agent behavior
Section titled “Configure agent behavior”For a Warp-managed factory, edit agent settings in the web app. For a GitHub-backed factory, settings are read-only in the web app; edit the factory definition files instead. See where the definition lives.
-
In the web app sidebar, click your factory to expand it, then click Agents.
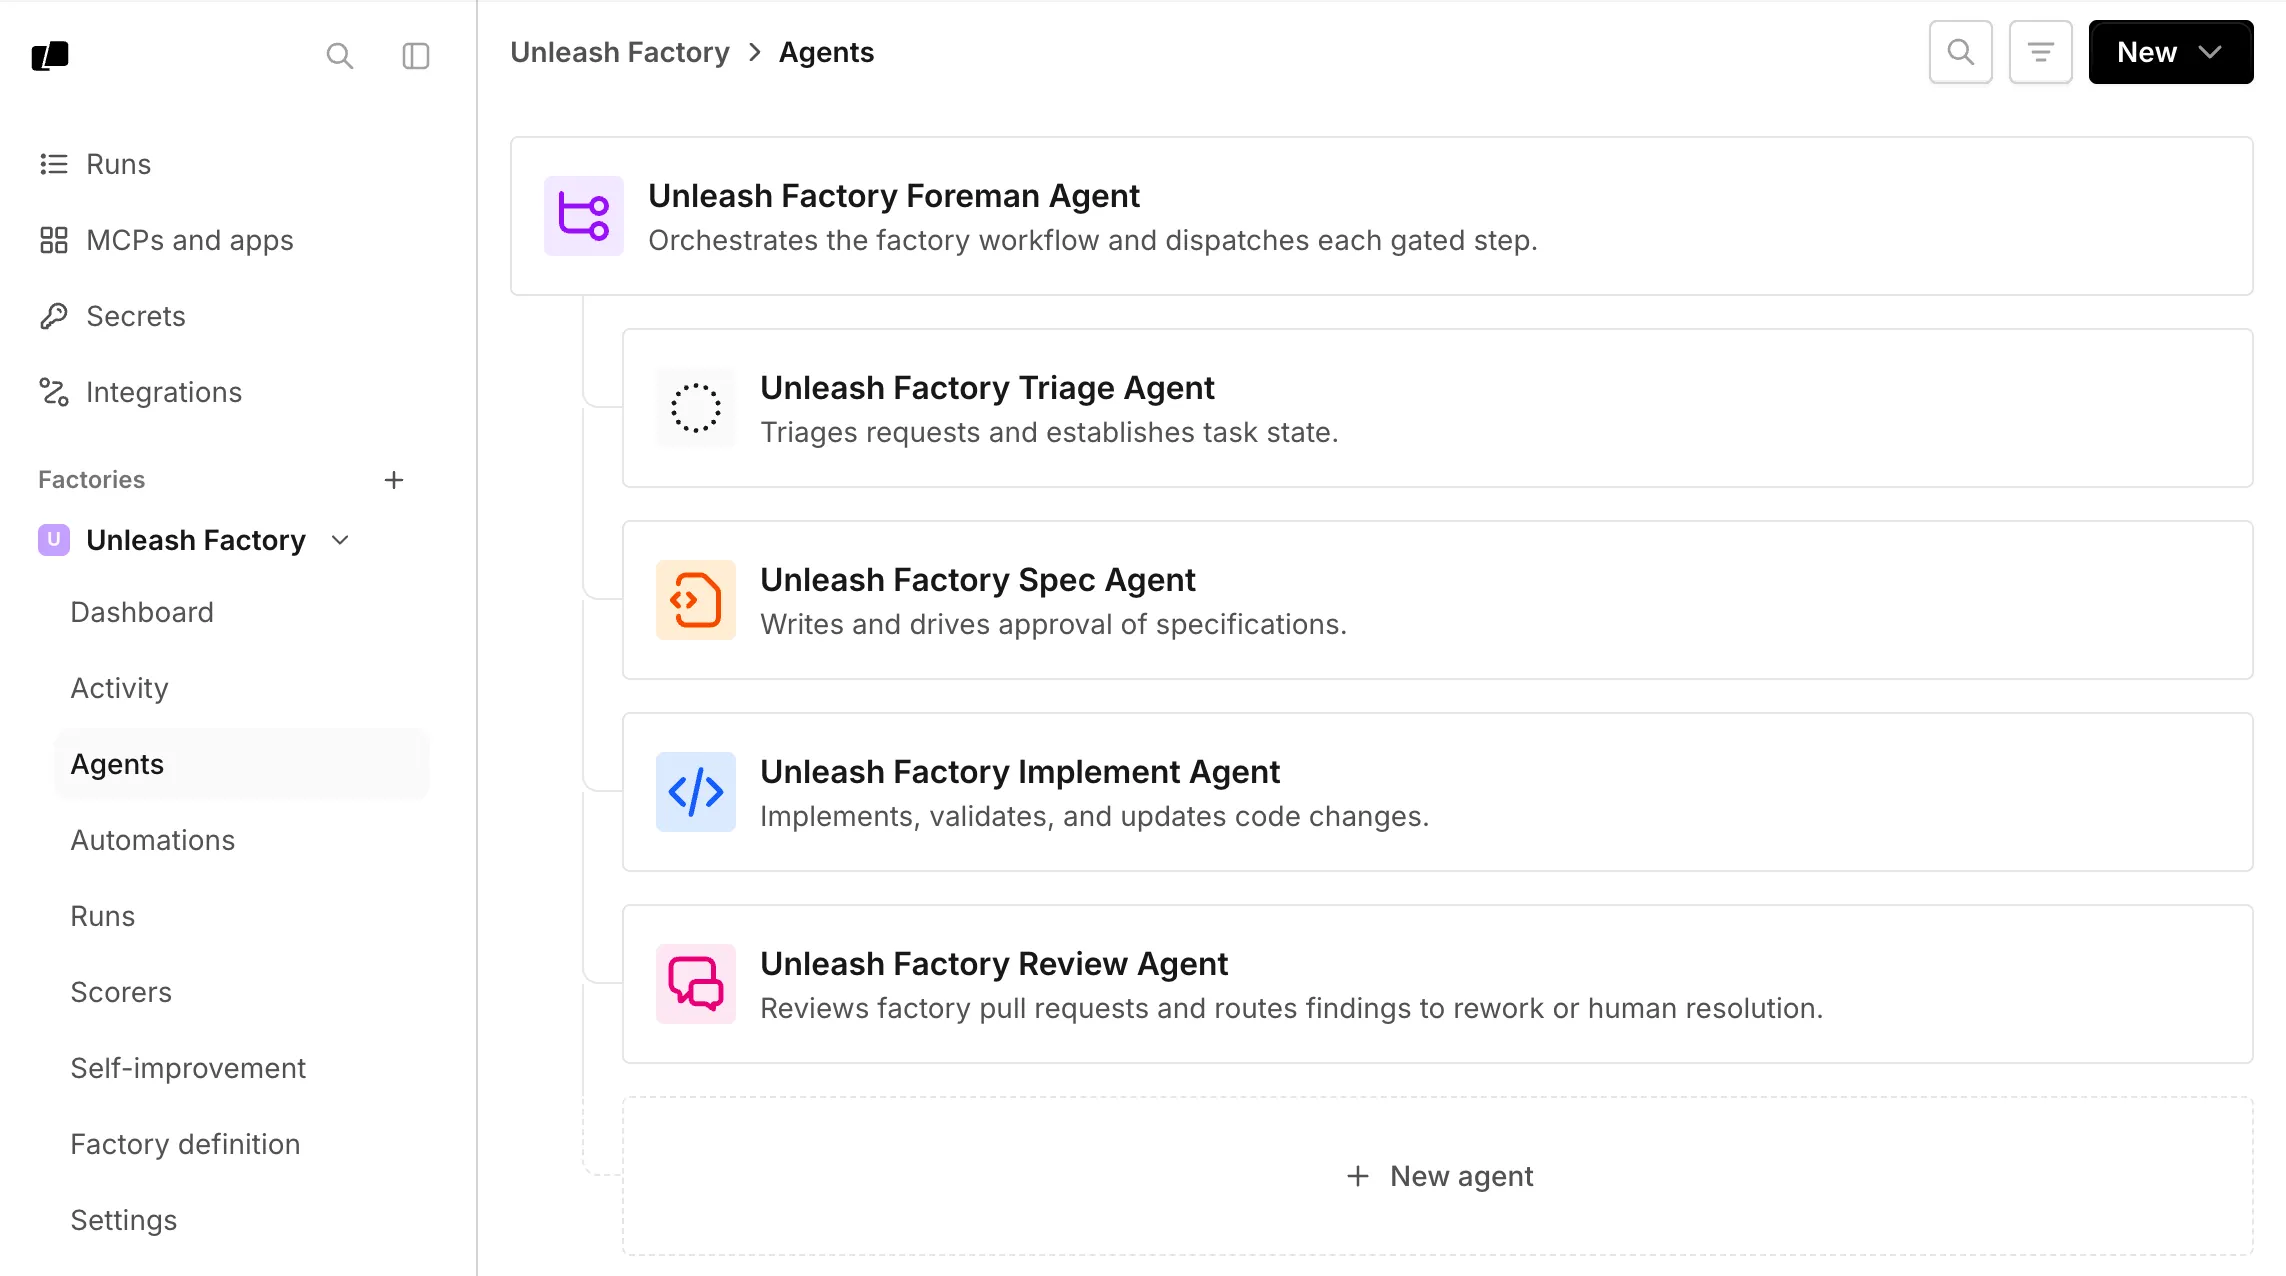
The Agents page lists a factory’s foreman and default agents. -
Click an agent, then click Settings.
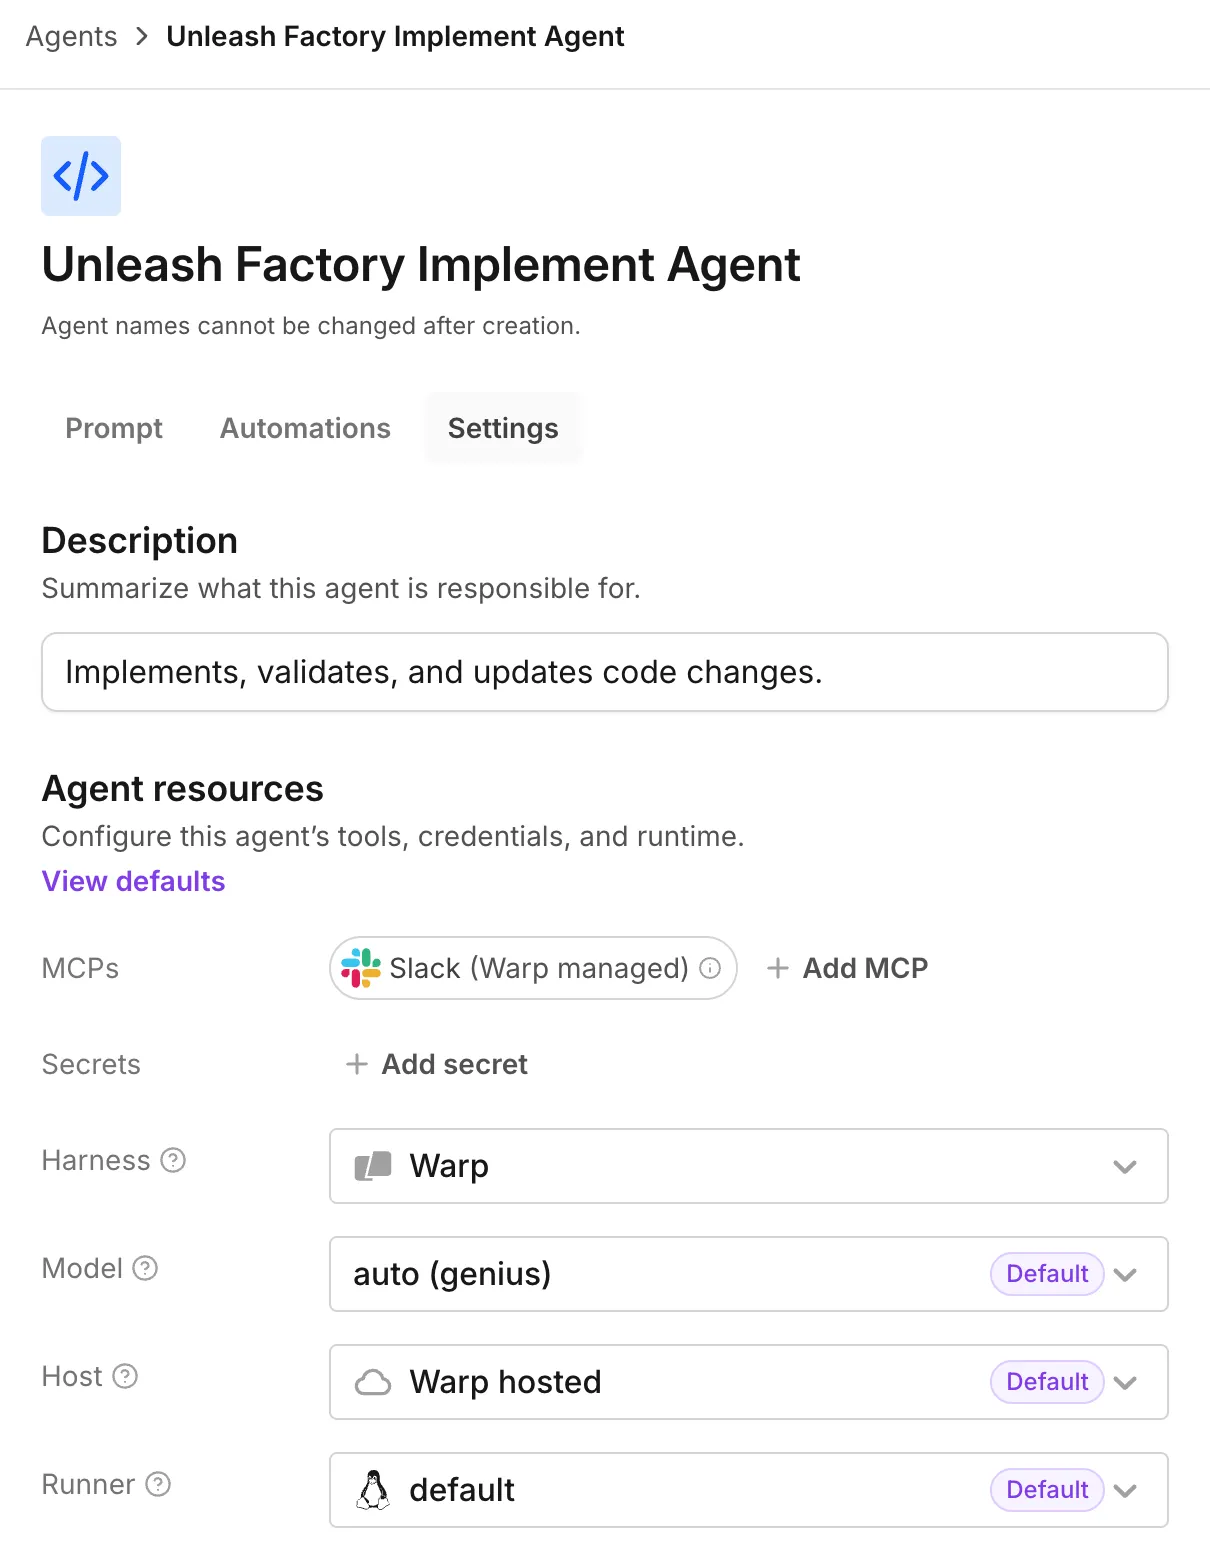
The Settings tab contains the agent’s description and resources. -
Edit the agent description, harness, model, runner, host, MCP servers, or secrets.
-
To change the agent’s instructions, click Prompt and edit the prompt.
-
In the top-right corner, click Save.
Choose models and harnesses per agent
Section titled “Choose models and harnesses per agent”Each agent can run on its own model and harness. To change the model an agent uses, edit that agent’s settings. Supported harnesses include the Warp Agent harness, Claude Code, and Codex, and any agent can use any of them. A foreman running on Claude Code or Codex can still dispatch the factory’s other agents, and the runs it starts are still tracked as its children.
Third-party harnesses require a paid plan; on the Free plan every agent runs on the Warp Agent harness. See Warp pricing for what each plan includes.
Default model IDs change over time, so choose based on what each agent has to do well:
| Agent | What to optimize for |
|---|---|
| Foreman | Orchestration, instruction following, and long-running conversations |
| Triage | Research, evidence gathering, and working with connected tools |
| Spec | Synthesizing requirements, technical reasoning, and precise writing |
| Implement | Coding strength, with a harness that fits your repositories and toolchain |
| Review | A different model or harness from the implement agent, so the two don’t share blind spots |
The model picker also includes custom routers from factories you can access. See model choice for agents, custom model routers, and harnesses for cloud agents for available options.
Configuring a third-party harness
Section titled “Configuring a third-party harness”Change an agent’s harness to Claude Code or Codex to run it with that provider’s own coding tool instead of the Warp Agent.
-
In the web app sidebar, click your factory to expand it, then click Agents.
-
Click an agent, then click Settings.
-
In the “Harness” dropdown, choose Claude Code or Codex. The “Auth” field appears for these harnesses.
-
In the “Auth” field, choose a compatible, team-owned secret from the list or click New auth secret to create one.
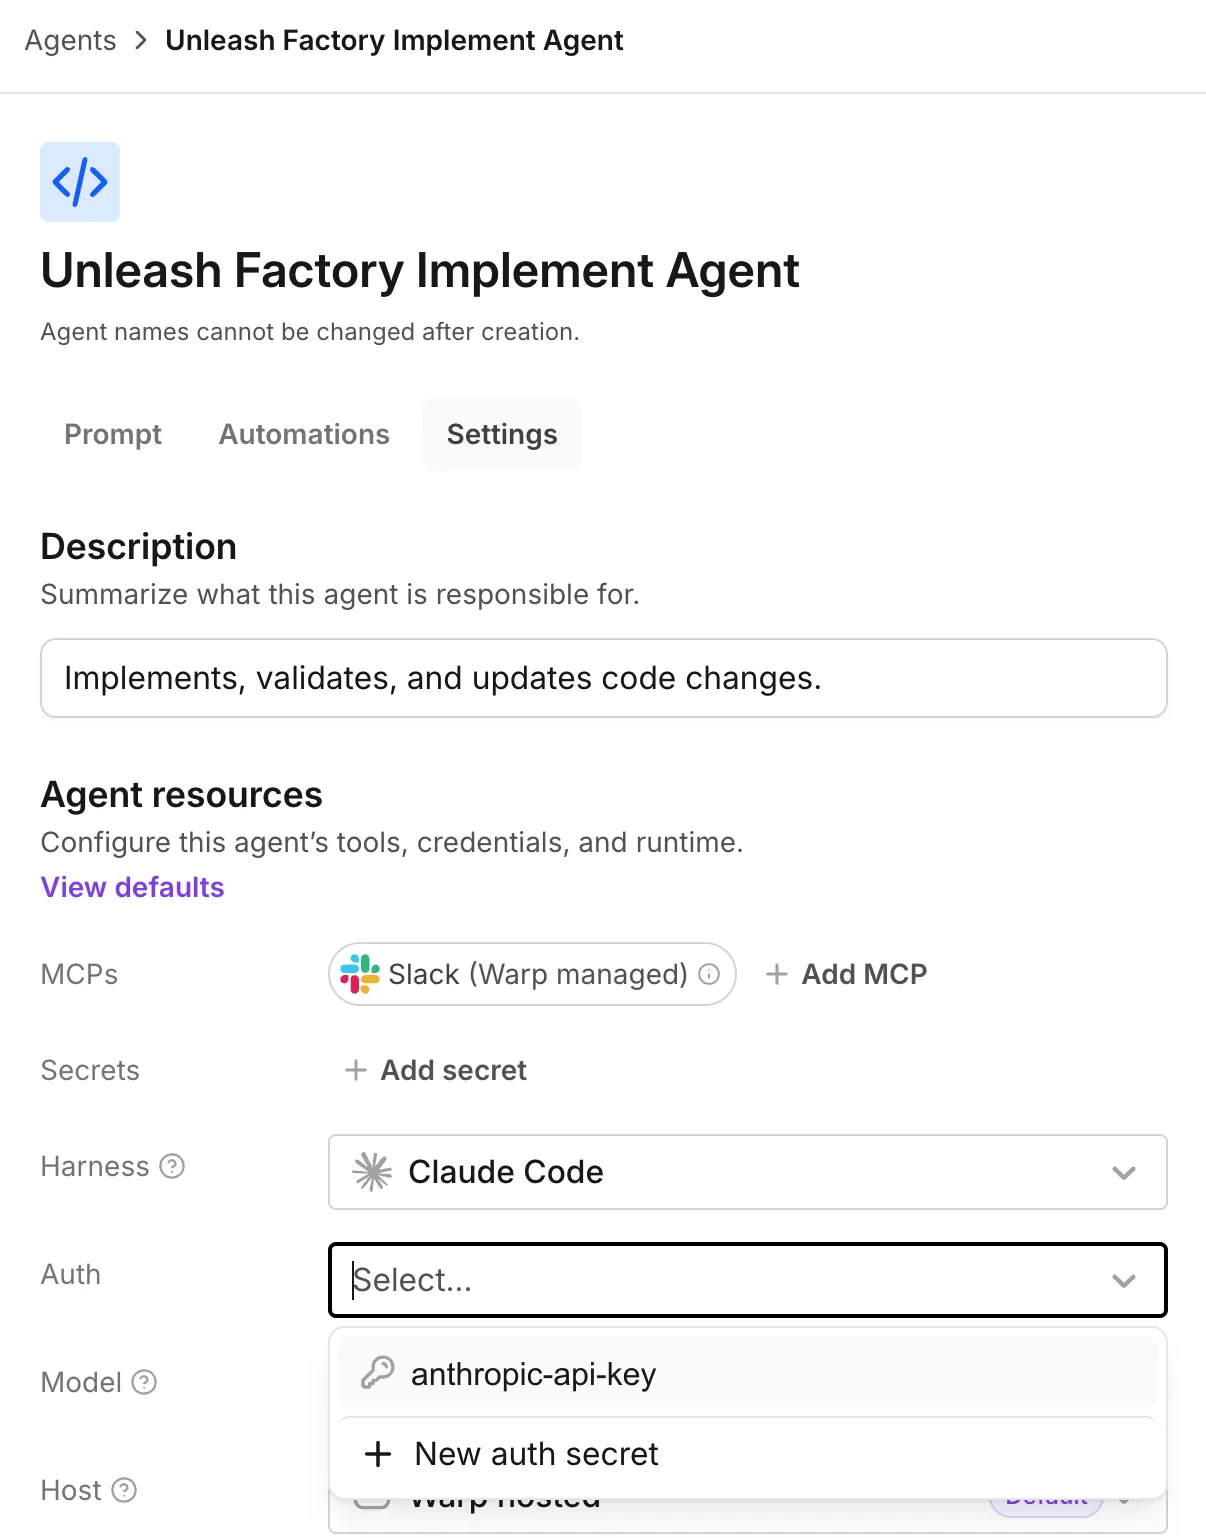
The Auth dropdown appears when a third-party harness is selected. -
In the “Model” dropdown, choose a model from that harness’s catalog.
-
In the top-right corner, click Save.
With a Warp-managed factory, you can edit harness, auth, and model from the dashboard. A GitHub-backed factory sets them through agentDefaults.harness or a per-agent harness override in the definition files. For an example, see 03-multi-harness.
Add custom agents and automations
Section titled “Add custom agents and automations”Add a custom agent for a role that needs separate instructions, configuration, and runs.
For a Warp-managed factory, open Agents in the factory dashboard, click New, then click Custom agent. For a GitHub-backed factory, add agents/<name>/agent.md. See the agent.md configuration keys.
Custom agents have no built-in skills. Add factory skills based on who needs them:
- One agent - Put the skill under
agents/<name>/skills/. - Every agent - Put the skill under
skills/.
Choose a configured factory agent
Section titled “Choose a configured factory agent”Use run_agents when the foreman should give work to one of the agents configured in your factory. The foreman receives a list of those agents, with a unique ID (UID) for each one.
Run the child remotely by setting the call’s remote field, then copy the chosen agent’s UID into agent_run_configs[].agent_identity_uid. Only use UIDs from the list, and select an agent for every child in the call. The name field only labels the child run; it doesn’t choose the factory agent.
Warp uses the UID to load that agent’s configured environment, runner, host, harness, and model unless the call overrides them. To start a child without factory configuration, use multi-agent orchestration from any Warp conversation.
Automations start a chosen agent on a schedule or when an event fires. They’re one more way for work to enter your factory; the foreman still coordinates whatever they start. For all the ways to route work into a factory, see connect your factory.
Human decision points and permissions
Section titled “Human decision points and permissions”| Decision | Default behavior | What enforces it |
|---|---|---|
| Spec approval | The foreman asks a human to clarify ambiguity and approve every spec | Workflow policy in the foreman’s instructions, which your team can change |
| Merging | Agents never merge; the foreman hands the finished pull request to a human | Your repository’s permissions decide who can approve and merge |
| Runtime access | Each agent reaches only the repositories, secrets, and MCP servers in its configuration | Platform configuration and the permissions of the connected providers |
The first two rows are conventions: they live in the foreman’s instructions and your repository settings, and your team can change them. Access is different. What an agent can reach comes from its configuration and the permissions of the connected providers, never from its instructions — changing what an agent is told to do doesn’t change what it’s able to do.
So enforce with the real controls: branch protection and repository permissions decide who merges, and each agent’s configuration decides what it can reach.
Next, capture these choices in factory definitions as code.